| | 2010 GRiSO 8v lifter inspection |  |
|
+5KeithEMason Oz1200Guzzi Pete Roper beetle hipower 9 posters |
|
| Author | Message |
|---|
Pete Roper
GRiSO Capo

Posts : 10555
Join date : 2013-05-29
Age : 67
|  Subject: Re: 2010 GRiSO 8v lifter inspection Subject: Re: 2010 GRiSO 8v lifter inspection  Wed Aug 12, 2020 5:51 pm Wed Aug 12, 2020 5:51 pm | |
| The oil line washers aren't part of any kits I've ever received. They're actually Dowty seals but copper or alloy washers will do although I just re-use them and have never had one leak. | |
|
| | |
hipower
Tanabuso

Posts : 68
Join date : 2020-06-06
| | Subject: Re: 2010 GRiSO 8v lifter inspection Mon Aug 17, 2020 7:56 pm | |
| | |
|
| | |
hipower
Tanabuso
Posts : 68
Join date : 2020-06-06
| | Subject: Re: 2010 GRiSO 8v lifter inspection Mon Aug 17, 2020 9:25 pm | |
| I need to verify the cam timing. The online manual isn't clear, or maybe I need to read it again. It looks like the pin should be down when the crank is up at TDC on the compression stroke. Is this right? [You must be registered and logged in to see this image.] | |
|
| | |
Pete Roper
GRiSO Capo
Posts : 10555
Join date : 2013-05-29
Age : 67
| | Subject: Re: 2010 GRiSO 8v lifter inspection Mon Aug 17, 2020 9:42 pm | |
| Correct. A line drawn between the two screw holes for the breather plate should bisect the pin. Note that the sprocket has two pin holes. One marked L and one R. These obviously relate to which one you use for the left or right clinders. | |
|
| | |
hipower
Tanabuso
Posts : 68
Join date : 2020-06-06
| | Subject: Re: 2010 GRiSO 8v lifter inspection Mon Aug 17, 2020 10:02 pm | |
| thanks Pete,
I was REALLY careful not to let the timing chains slip a tooth. I used zip ties on them when ever I wasn't holding them.
I also have a question on the head gaskets. The kit came with three sets and I just put in the thickest set without looking into why there are three sets. The engine would pink a little under load, usually in hot weather. I got used to just backing off the throttle when I heard it. And this is with premium gas. Maybe I should have experimented with 100 octane race gas but that stuff is $10/gal so I never bothered.
Then I started reading the manual. And I found the section about measuring the quench with the piston at TDC. I already had the left side torqued. I probably have a ground bar somewhere and a depth mic, or even a caliper would work.
I'd really like to get rid of the pinking so lowering the compression ratio seems the easiest way to do it. Now I think about it I wish I rounded all the sharp corners, like around the spark plug hole.
So what is everyone's opinion on the head gasket thickness? I went the safe rout but now I wish I thought about it a little more before putting the heads on. | |
|
| | |
Pete Roper
GRiSO Capo
Posts : 10555
Join date : 2013-05-29
Age : 67
| | Subject: Re: 2010 GRiSO 8v lifter inspection Mon Aug 17, 2020 10:28 pm | |
| You won't of risked anything but a probably unnoticeable loss of performance. The reason why the squish is set by gasket thickness is to reduce emissions, mostly oxides of nitrogen, while there is an elaborate rig available for checking the squish if you are fitting new barrels and pistons in everyday circumstances all you need to do is measure the old gasket as it comes off. It's steel and effectively incompressible so measuring it is easy, and then just use the same thickness gasket as it goes back together.
For many years now, probably a decade, the gaskets have also been colour coded by a line of paint on the outer edge. The thinnest ones don't have a paint mark, the middle ones have a yellow mark and the fat ones a blue/green paint mark. I find this useful when I'm rummaging around in my gasket box but I always measure the ones that come off.
While it is obviously best to use the correct gaskets, (Most engines use the middle ones.) I don't think that many polar bears are going to drown as their ice floes melt from under them because one GRiSO has a slightly wider squish than is ideal but as a principle it's good to do the right thing. | |
|
| | |
hipower
Tanabuso
Posts : 68
Join date : 2020-06-06
| | Subject: Re: 2010 GRiSO 8v lifter inspection Mon Aug 17, 2020 10:55 pm | |
| I still have the old gaskets so I'll measure them tomorrow. I can feel the difference in them by their stiffness but a micrometer doesn't lie.
I'm still waiting on parts. I found the missing pads in the unopened cam box box, doah.. and I called Proitalia to tell them I'm an idiot and don't need the parts. They already called Piaggio NA but I think I got them in time to save the hassle.
Now I'm finding more parts that need replacing. Cracks in rubber breathing lines, things like that. The bike is a decade old so its not a surprise | |
|
| | |
Pete Roper
GRiSO Capo
Posts : 10555
Join date : 2013-05-29
Age : 67
| | Subject: Re: 2010 GRiSO 8v lifter inspection Tue Aug 18, 2020 8:55 pm | |
| The breather lines are a PITA. You can make up alternatives but they last a fair while so I've never been bothered myself. I do advise if you're doing the breathers also do the horrid little condom on the breather box as these go soft and eventually split. If your hoses have gone the condom won't be far behind. | |
|
| | |
Street
L'Innominato


Posts : 3388
Join date : 2013-05-29
Age : 65
| | Subject: Re: 2010 GRiSO 8v lifter inspection Tue Aug 18, 2020 9:52 pm | |
| Pete Roper didn't write:
...the horrid little condoms, these go soft and eventually split. If your hose's gone, the condom won't be far behind.
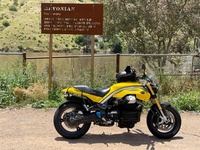
I amuse myself... --- --- --- --- --- --- --- --- --- --- --- --- --- --- --- --- --- --- --- --- --- --- --- --- [You must be registered and logged in to see this image.]“When I'm riding my motorcycle, I'm glad to be alive.
When I stop riding my motorcycle, I'm glad to be alive.” - Neil Peart[You must be registered and logged in to see this link.] | |
|
| | |
Sponsored content
| | Subject: Re: 2010 GRiSO 8v lifter inspection | |
| |
|
| | |
| | 2010 GRiSO 8v lifter inspection | |
|


